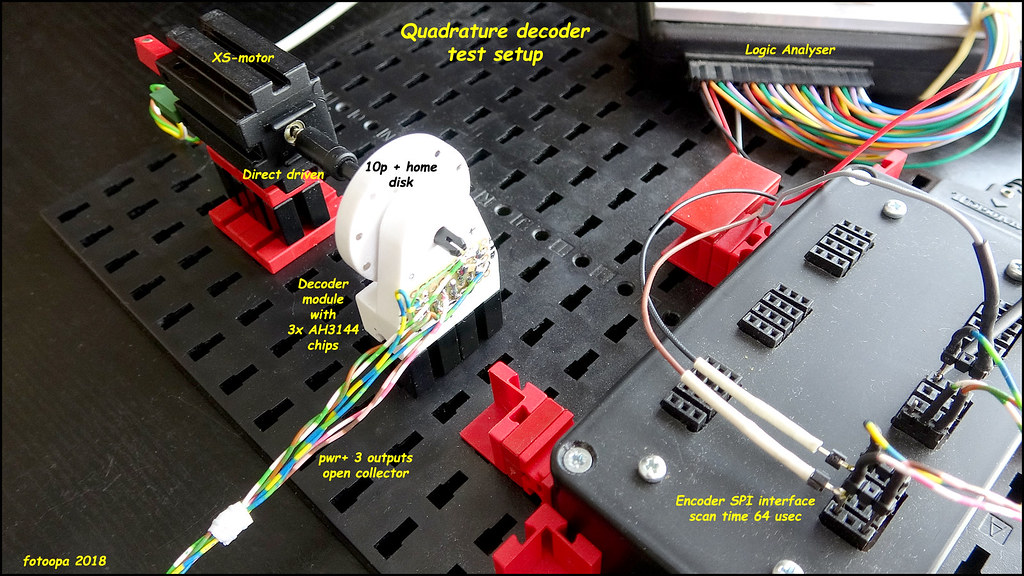
Here the measurement setup:
HD version: https://www.flickr.com/photos/fotoopa_hs/30330106077
The logic analyser is connected to the output signals of the hall. These outputs are open collector type and fit easily on most interfaces. The power supply voltage can be between 3V3 and 24V, so also ideal for the FT controllers. I use 5V as power supply and on the outputs comes 3K3 as pullup resistor. This comes standard from my own SPI interface box.
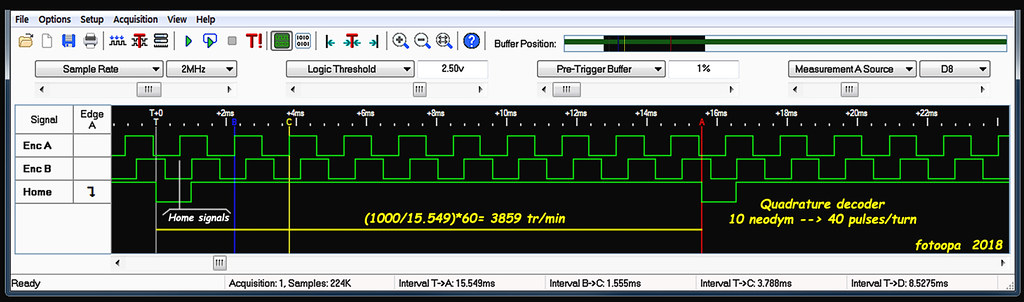
The signals on the LA:
HD version: https://www.flickr.com/photos/fotoopa_hs/31394445468
As can be seen on the LA, the quadrature signals are nicely rotated 90 degrees in phase and the homepoint also coincides nicely with one of the flanks of encA. First I had made a disc for 12 magnets on this diameter but after measuring it appeared that the hall distance was not correct to get a symetric pulse. Because of the diameter of the neodymium magnets, 2mm, the distance between each next magnet is actually determined. This distance is 2.88*pi = 9 mm. When designing the encoder disk you should take this into account. Both halls must be at 1.25x the magnet distance (11.3 mm). These values are for a good magnetic coupling, this is necessary to obtain a stable signal even at high rpm. The LA gives a rotation speed of over 3850 rpm but the XS motor, directly coupled, can go up to 8500 rpm. To connect the XS-motor I drilled a FI-35073 block over 7.5mm length so I could press it on the end of the motor. If you want to use this high speed it is better to mount a small ball bearing. I use a bearing of D8xD4x3mm for this. I will make a version later where this bearing will be directly printed in 3D in the decoder flange.
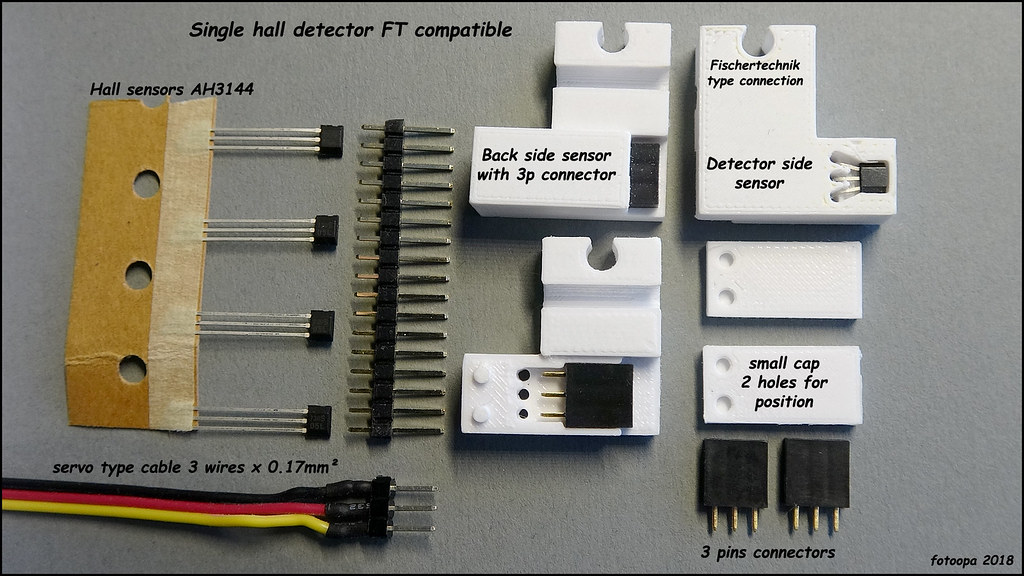
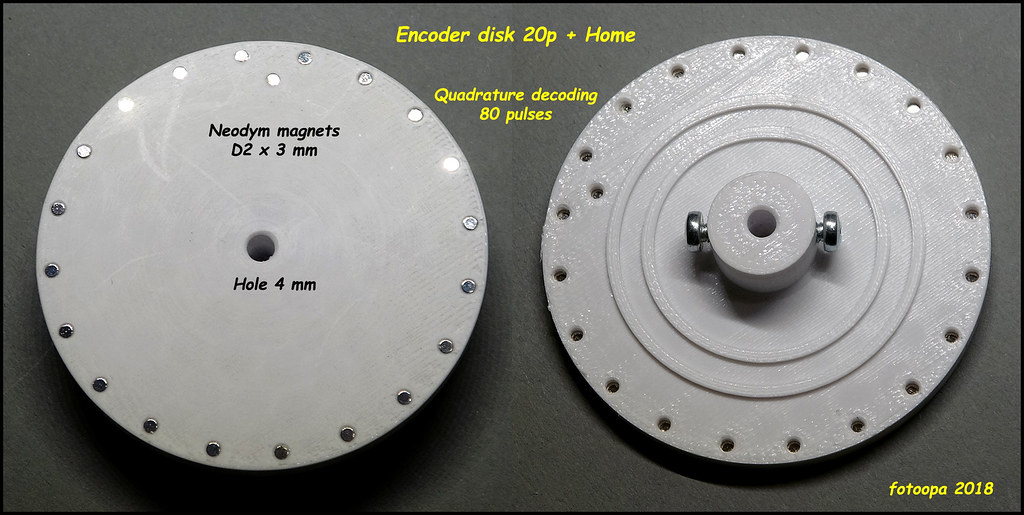
Here some more details pictures of the printed parts:
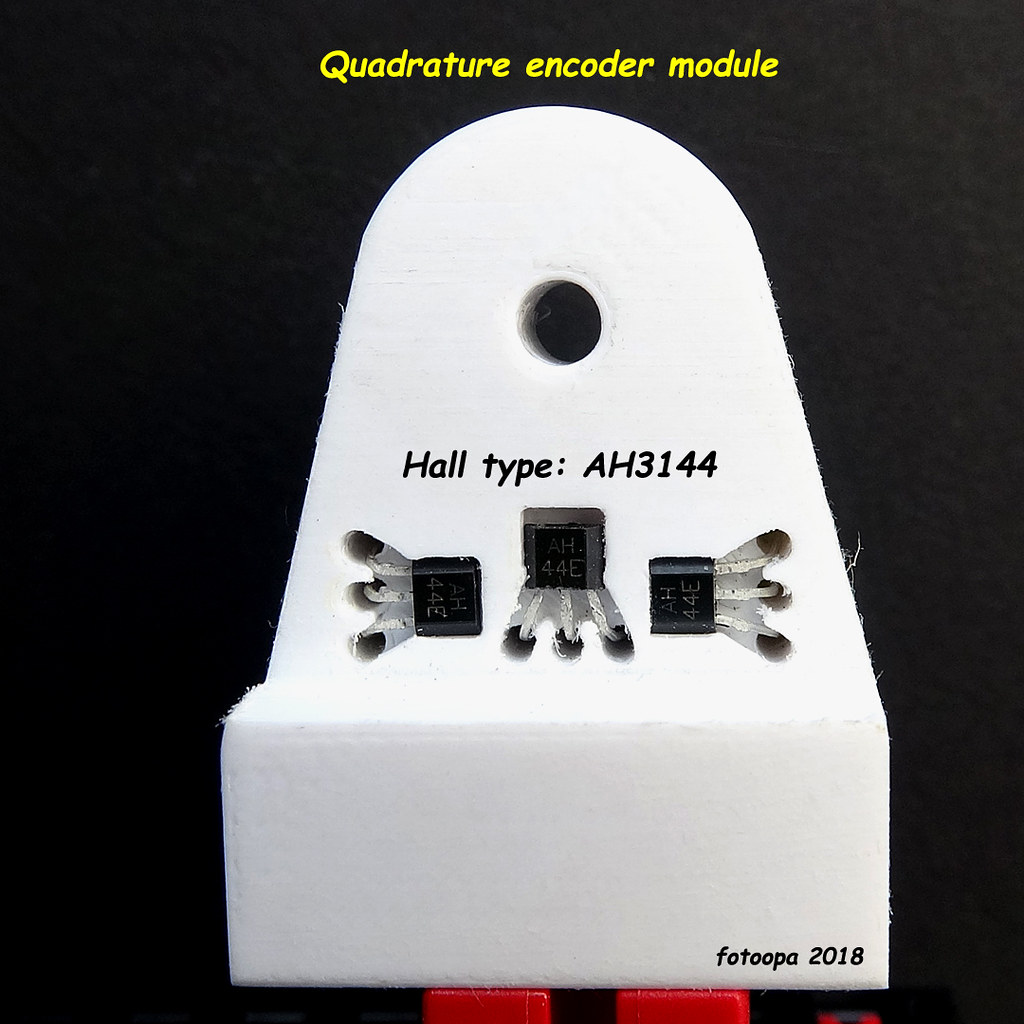
Hd version: https://www.flickr.com/photos/fotoopa_hs/31394446208
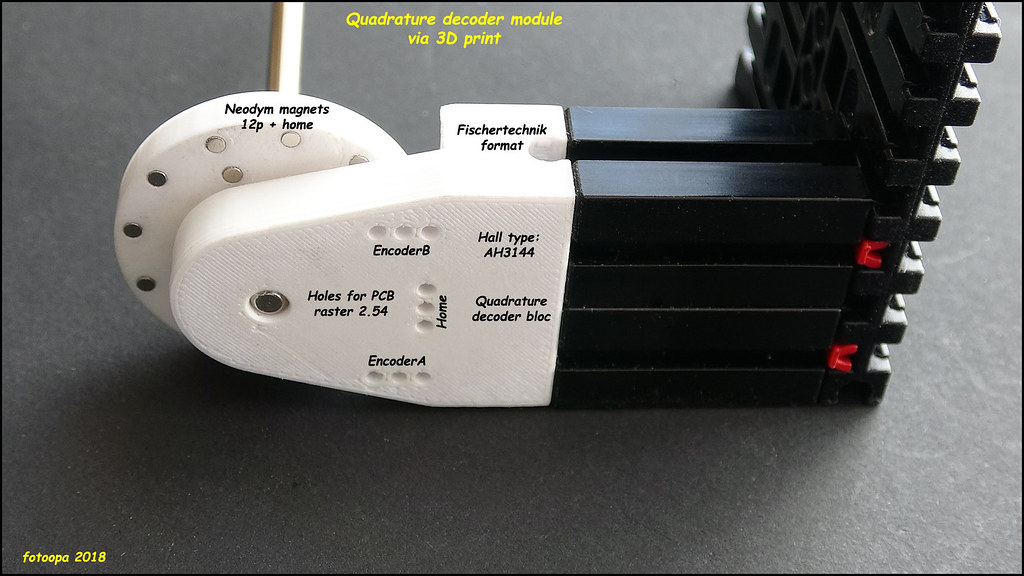
Hd version: https://www.flickr.com/photos/fotoopa_hs/30330106467
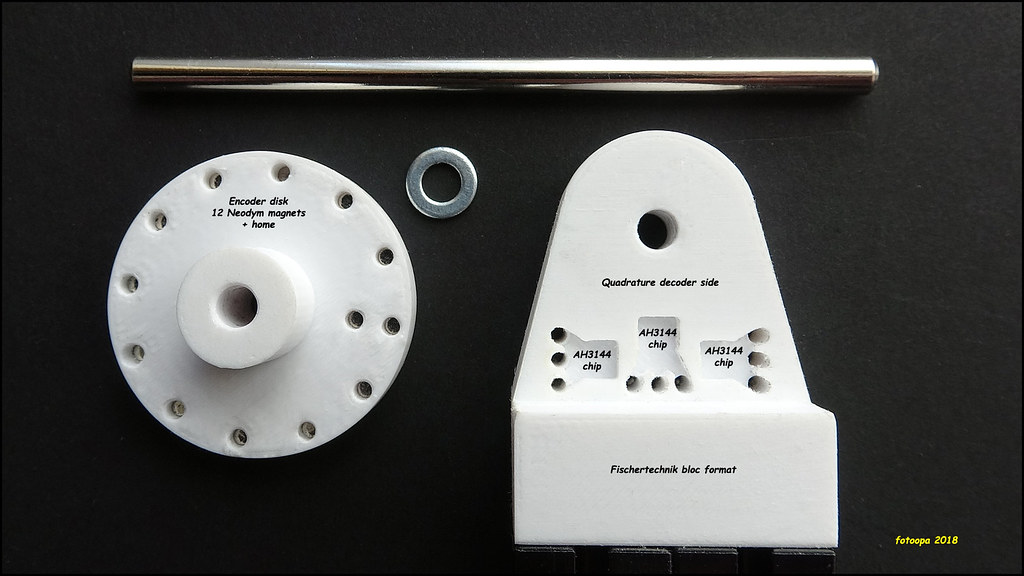
Hd version: https://www.flickr.com/photos/fotoopa_hs/31394446858
Note these last images were still with 12 magnets on the disk, the new version has only 10 magnets on it. Everything is drawn with Autodesk Fusion 360 with parameter design. This way I can quickly make any type of disc with more or less magnets. The output is a .STL file that goes to my FlashForge Finder printer. I use the glue supplied as standard so that the objects do not come loose during printing. The material used is PLA at 210 degrees. I also use a Brim around the objects and the print speed is 60. I use a 30% fill.
This is my first real project with 3D printing. I still have a lot to learn but what's nice is that the results are very good from the start. I have no wrong prints. I still have to make all the data available via Thingiverse.
Frans.